
FLOWii is a comprehensive internet application with which you can effectively manage your company. It consists of several solutions – CRM, order management, project management, tanosk management, invoicing, revenue and expenditure records, warehousing, employee attendance records.
Sync range provided by the WooCommerce FLOWii Connector
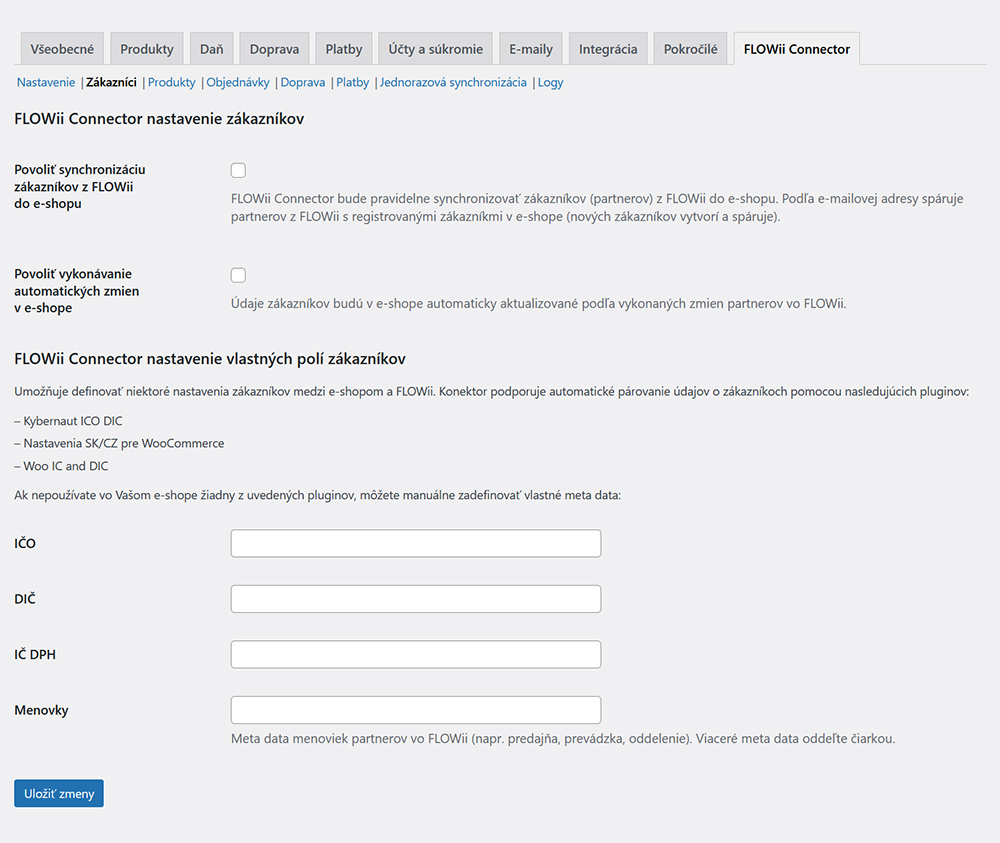
- Transfer of customers from WooCommerce to FLOWii (section Partners).
- Transfer of customers from FLOWii (section Partners) to WooCommerce.
- Transfer of orders from WooCommerce to FLOWii (section Invoicing) with the possibility of creating orders (contracts).
- Transfer of basic data about products and their categories from FLOWii to WooCommerce (product names, sales prices, product numbers, number of pieces, tree structure of categories).
Set the synchronization time interval
WooCommerce FLOWii Connector allows you to define a regular synchronization time interval in various intervals (5 minutes and more), or once a day at a specific time. If necessary, we can add other options to the interval configuration.
One-time synchronization
Part of the functionality of the plugin is also the manual execution of one-time synchronization, ie. in case you need to transfer data from one system to another immediately, select the appropriate option from the menu and have it done.
- Import of all products and categories from FLOWii to the e-shop. Existing products and categories are updated in the e-shop (names, prices, stock levels), new products are imported as drafts so that they can be modified in the e-shop as needed (description, images) and finally published.
- Export of all customers from the e-shop to FLOWii. New customers are added, existing ones are updated.
- Import of all customers from FLOWii to e-shop. New customers are added, existing ones are paired between FLOWii and the e-shop.
- Export of all new orders from the e-shop to FLOWii. The successfully transferred order is assigned an order number from FLOWii in the e-shop. This number is displayed in the e-shop in the list of orders and in the order detail, thanks to which you have an overview of which orders were successfully transferred.
- Export of all previous orders from the e-shop to FLOWii. If you already have orders in the e-shop that were generated before installing and activating the FLOWii Connector, you can transfer them all to FLOWii.
Logs
Logs of synchronization between the e-shop and the REST API FLOWii are displayed within the plugin interface.
To deploy the WooCommerce FLOWii Connector:
1. Purchase the required application license FLOWii.
2. Buy and download the WooCommerce FLOWii Connector plugin from our e-shop wooconn.sk.
3. Install the purchased plugin in your WooCommerce e-shop (Plugins > Add new > Upload plugin) and activate it after installation.
4. Plugin settings can be found here: WooCommerce > Settings > FLOWii Connector tab.
5. Fill in all required fields:
- Purchase code – you will receive it after purchasing the plugin
- Login e-mail and password to FLOWii – data from your registration to FLOWii
- FLOWii API key – you can get it according to these instructions
- Sync scheduler – enter the synchronization time interval between your WooCommerce e-shop and the FLOWii application – either at regular intervals or once a day.
6. Click on the button “Load FLOWii data” to establish and verify the connection with FLOWii. If the connection is successful, the plugin will offer you data from your FLOWii account, which you can work with in the plugin settings.
7. Select the name of the supplier company under which orders from the e-shop are to be generated in FLOWii. Assign the type of customer under which customers are to be transferred to FLOWii in the section Partners. Assign a unit type for non-stock (non-price list) items to be displayed in orders in FLOWii.
8. Select the non-stock categories (those that you do not want to import from FLOWii to the e-shop as a product structure).
9. After saving the changes, go to the Delivery tab. In it, assign the delivery types from FLOWii to the shipping methods that you have defined in the e-shop. The delivery methods used must be interconnected between the two systems.
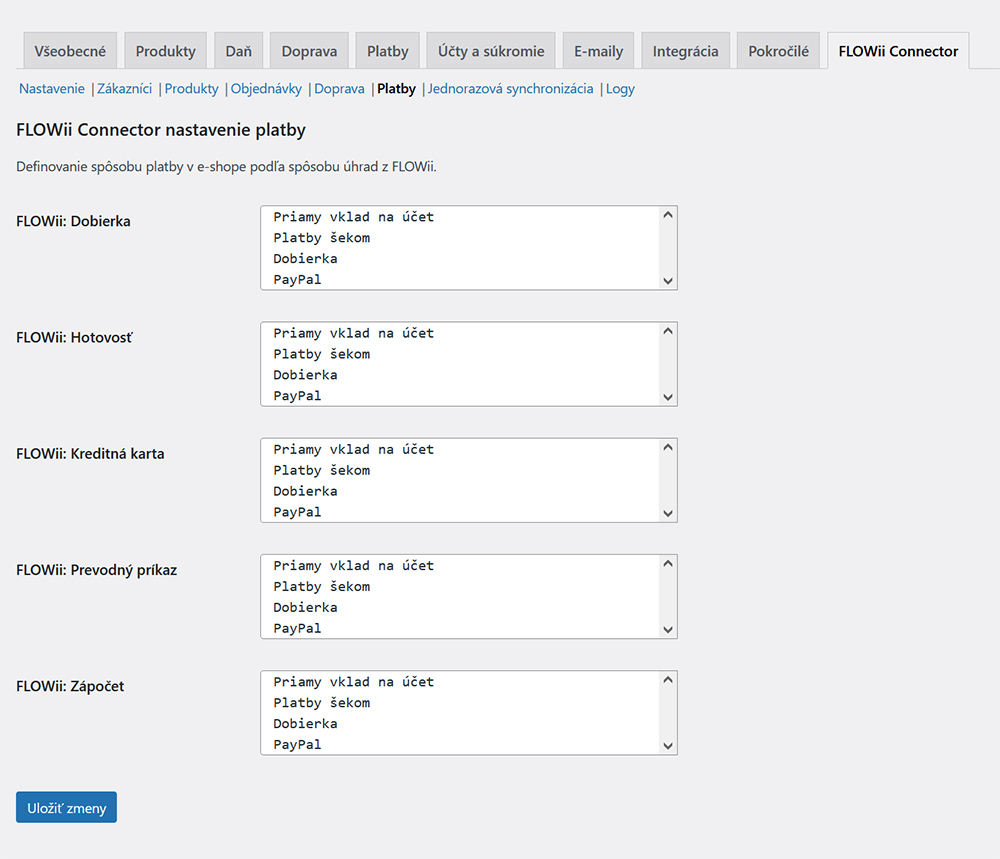
10. After saving your changes, go to the Payments tab. In it, assign the payment methods from FLOWii to the payment methods that you have defined in the e-shop. The payment methods used must be interlinked between the two systems.
11. Set up additional data related to syncing customers, products, and orders as needed.


Compatibility
WordPress: 5.2+
WooCommerce: 4.2+
PHP: 7.2+
How to set up a cron job
For the WooCommerce FLOWii Connector to work properly, it is necessary to set up a “cron job” at intervals of every 5 minutes. For more information on cron job setup options, see the FAQ.
Video tutorial for configuration of plugin
The demonstrations in the video tutorial simulate the transfer of data via one-time synchronization, which will not need to be performed after setting up the cron job call on the e-shop side. Cron job will perform synchronization automatically according to the selected time interval in the plugin settings.


