Pohoda is a complex economic system of the company STORMWARE, s.r.o. to manage accounting, warehousing, property, payroll and other agendas and to manage the company.
Scope of WooCommerce Pohoda Exporter plugin functionality
- Manual export of orders from WooCommerce to XML format for their import into the agenda of issued invoices in Pohoda.
- Scheduled export of invoices to XML files, their archiving and automatic sending to the accountant by e-mail.
- Automatic conversion of foreign currency to base currency in imported invoices to Pohoda according to the current ECB (EUR) or CNB (CZK) exchange rate.
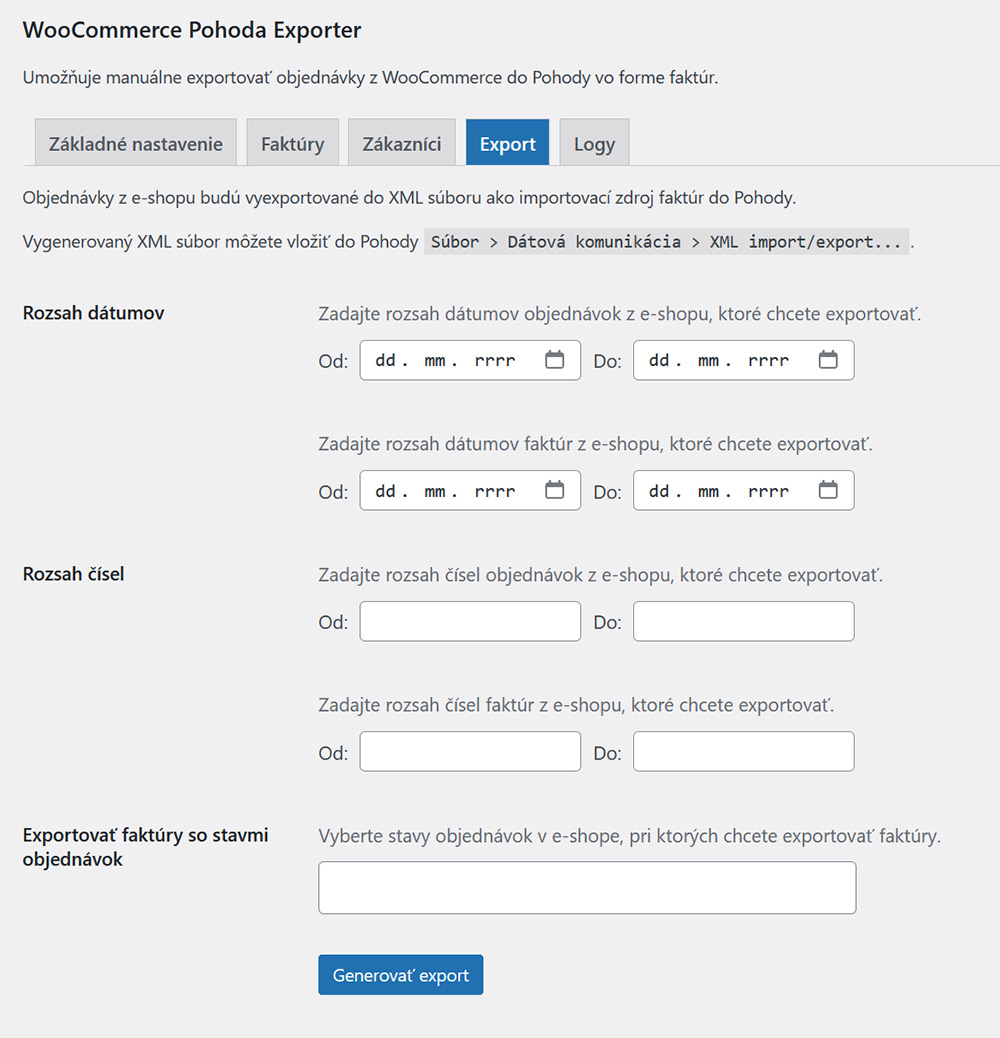
- Option to choose the range of order export generation according to dates, order numbers and order statuses.
- Compatibility with WooCommerce plugins for generating invoices in the e-shop (Invoices for WooCommerce, WooCommerce PDF Invoices & Packing Slips).
Logs
Logs (records) of all performed exports to Pohoda are displayed within the plugin interface.
How to deploy the WooCommerce Pohoda Exporter plugin and how to use it:
1. Buy and download the WooCommerce Pohoda Exporter plugin from our e-shop wooconn.sk.
2. Install the purchased plugin in your WordPress web (Plugins > Add new > Upload plugin) and activate it after installation.
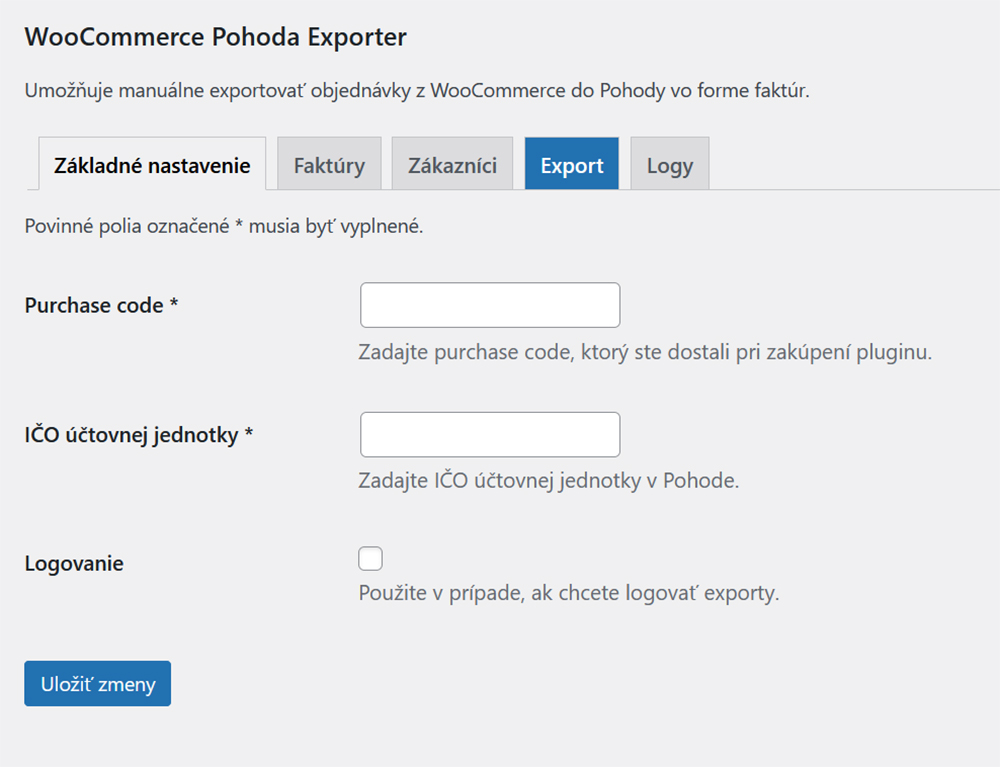
3. Plugin settings can be found here: WooCommerce > Pohoda Exporter.
4. Fill in all required fields:
- Purchase code – you will receive it after purchasing the plugin
- ID number of the accounting unit in Pohoda
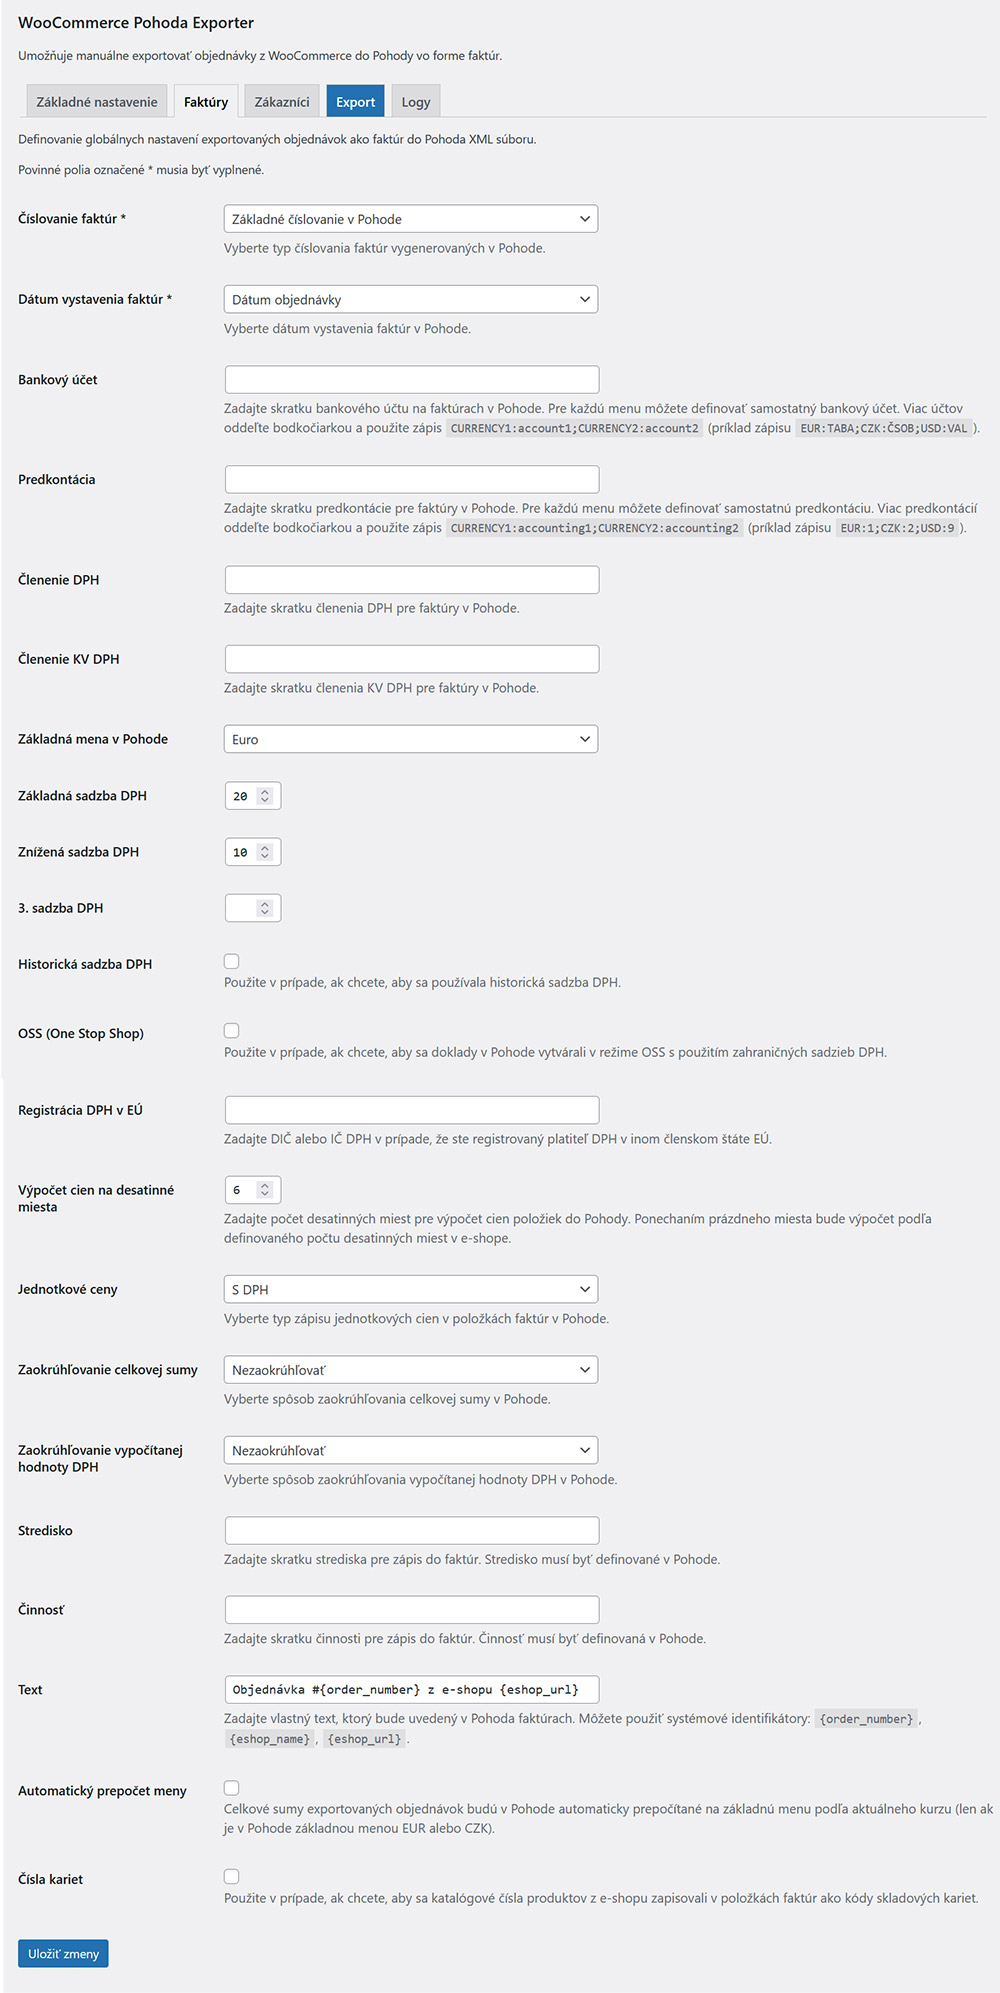
5. After verifying the purchase code, go to the Invoices tab and enter all the necessary and requested data for generating XML with invoices.
6. Go to the Export tab, where you select the scope of export of orders and click the Generate export button.
7. You import the generated XML output directly into Pohoda, or forward it to your accountant for the purpose of import.
8. In the Scheduled export tab, you can schedule a regular and automatic export of invoices to XML along with the option of sending them by e-mail to the accountant.
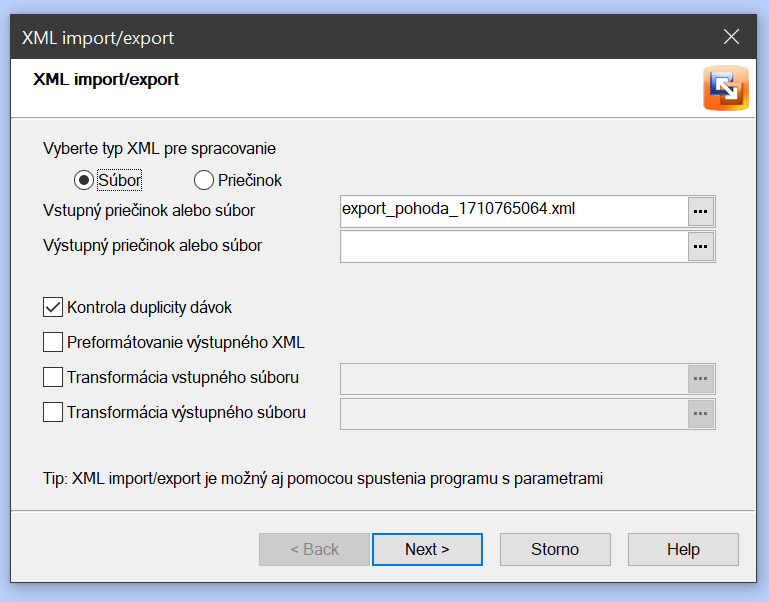
Import procedure into Pohoda:
1. In the Pohoda system, open File > Data communication > XML import/export.
2. Insert the generated XML file from our plugin into the open dialog box and click the Next button.
3. In the next step, click the Next button.
4. Subsequently, the result of the import processing will be displayed.
Compatibility
WordPress: 5.2+
WooCommerce: 4.2+
PHP: 7.2+
